Displacement measurement analysis in distortion detection of lithography projection objective
-
摘要
在光刻投影物镜的畸变检测中,位移测量误差是光刻投影物镜畸变检测的重要误差源之一,深度分析误差源并减小误差项,可提高光刻投影物镜的畸变检测精度。本文将运动台的定位与测量技术相结合,着重分析利用夏克-哈特曼波前传感器对投影物镜进行畸变检测时像质检测台的位移测量误差。并以一套投影物镜像质检测台为例,对其在投影物镜畸变检测中的位移测量误差进行分析,利用该像质检测台对某一投影物镜进行畸变检测,畸变检测结果约80 nm,其中该像质检测台的位移测量误差会给畸变检测结果带来约22 nm的不确定度。
Abstract
In the distortion detection of the lithography projection objective, the displacement measurement error is one of the important error sources. Depth analysis of the error sources and reduction of the error terms can improve the distortion detection accuracy. Combining the positioning and measurement technology of the moving stage, this paper analyzes the displacement measurement error of the image quality detection stage when the Shack-Hartmann wavefront sensor is used to detect the distortion of the projection objective. In this paper, a set of image quality detection platform is taken as an example to analyze the displacement measurement error in the distortion detection of the projection objective, and the image quality detection platform is used to measure the distortion of a projection objective. The distortion detection result is about 80 nm, in which the displacement measurement error of the image quality detection platform will bring about an uncertainty of about 22 nm to the distortion detection result.
-
Overview
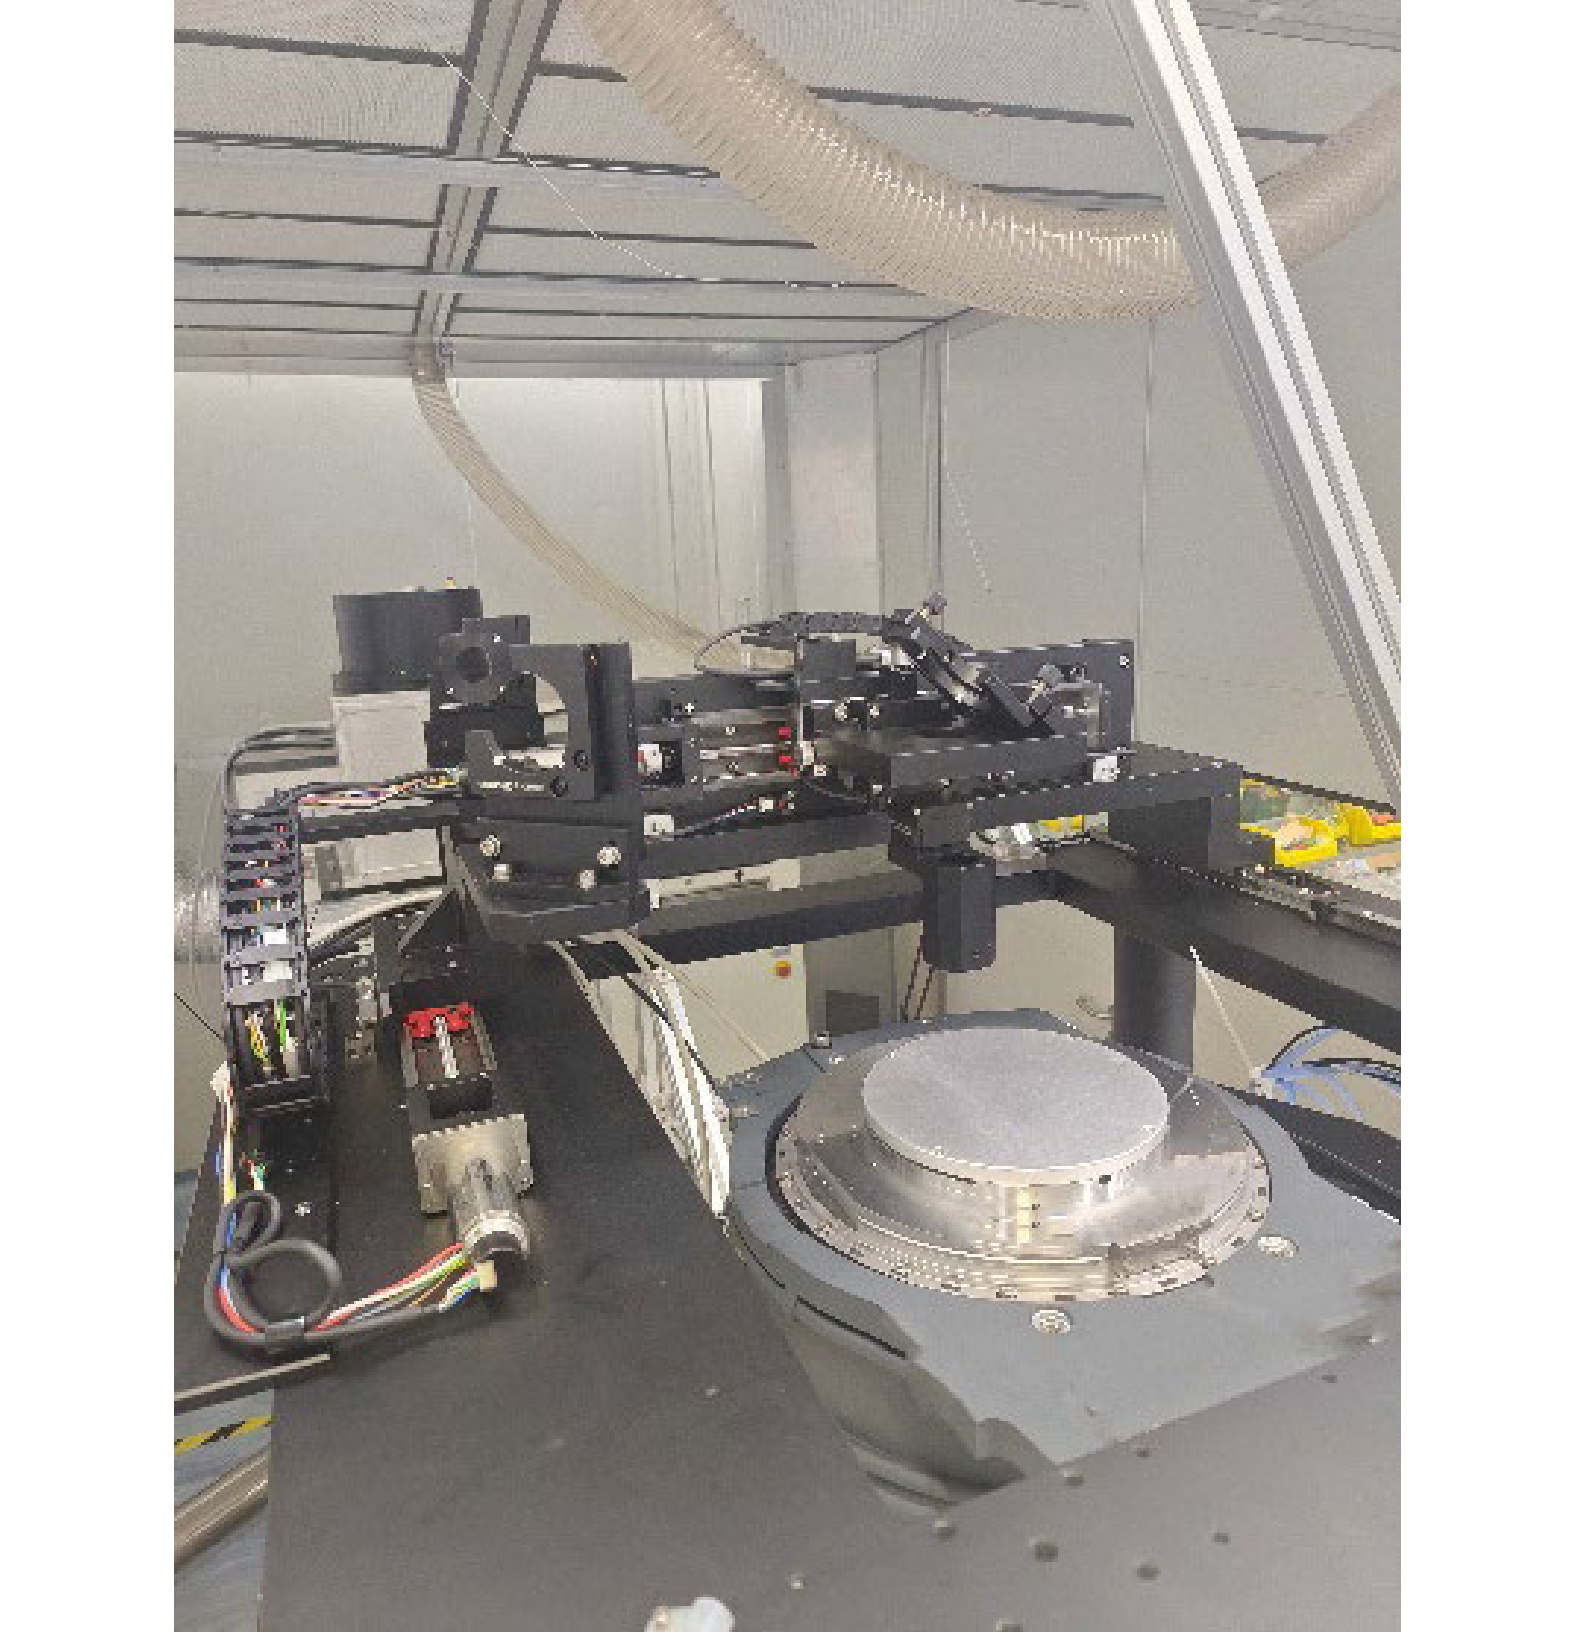
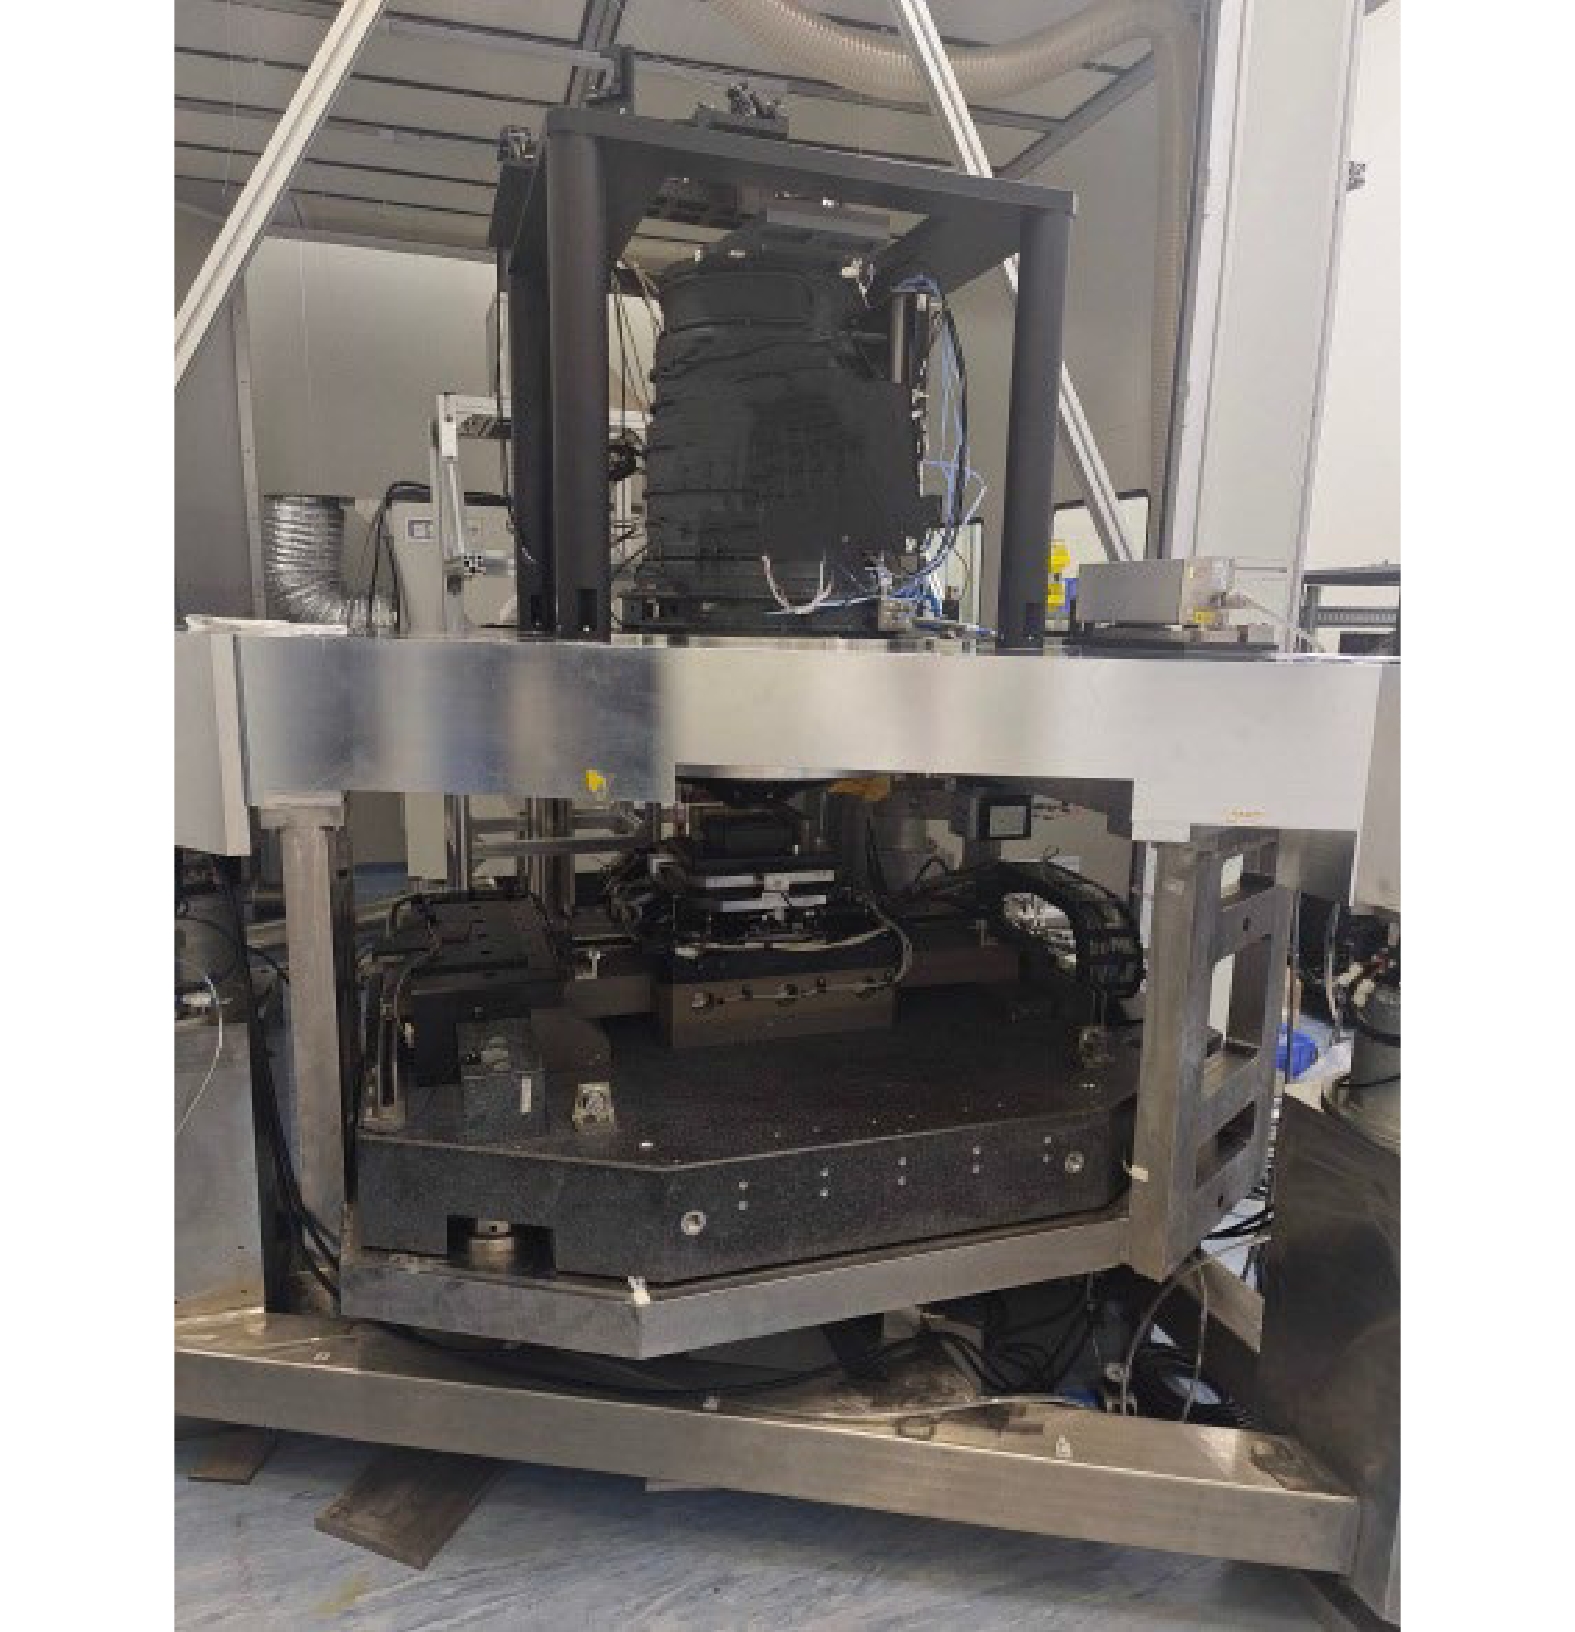
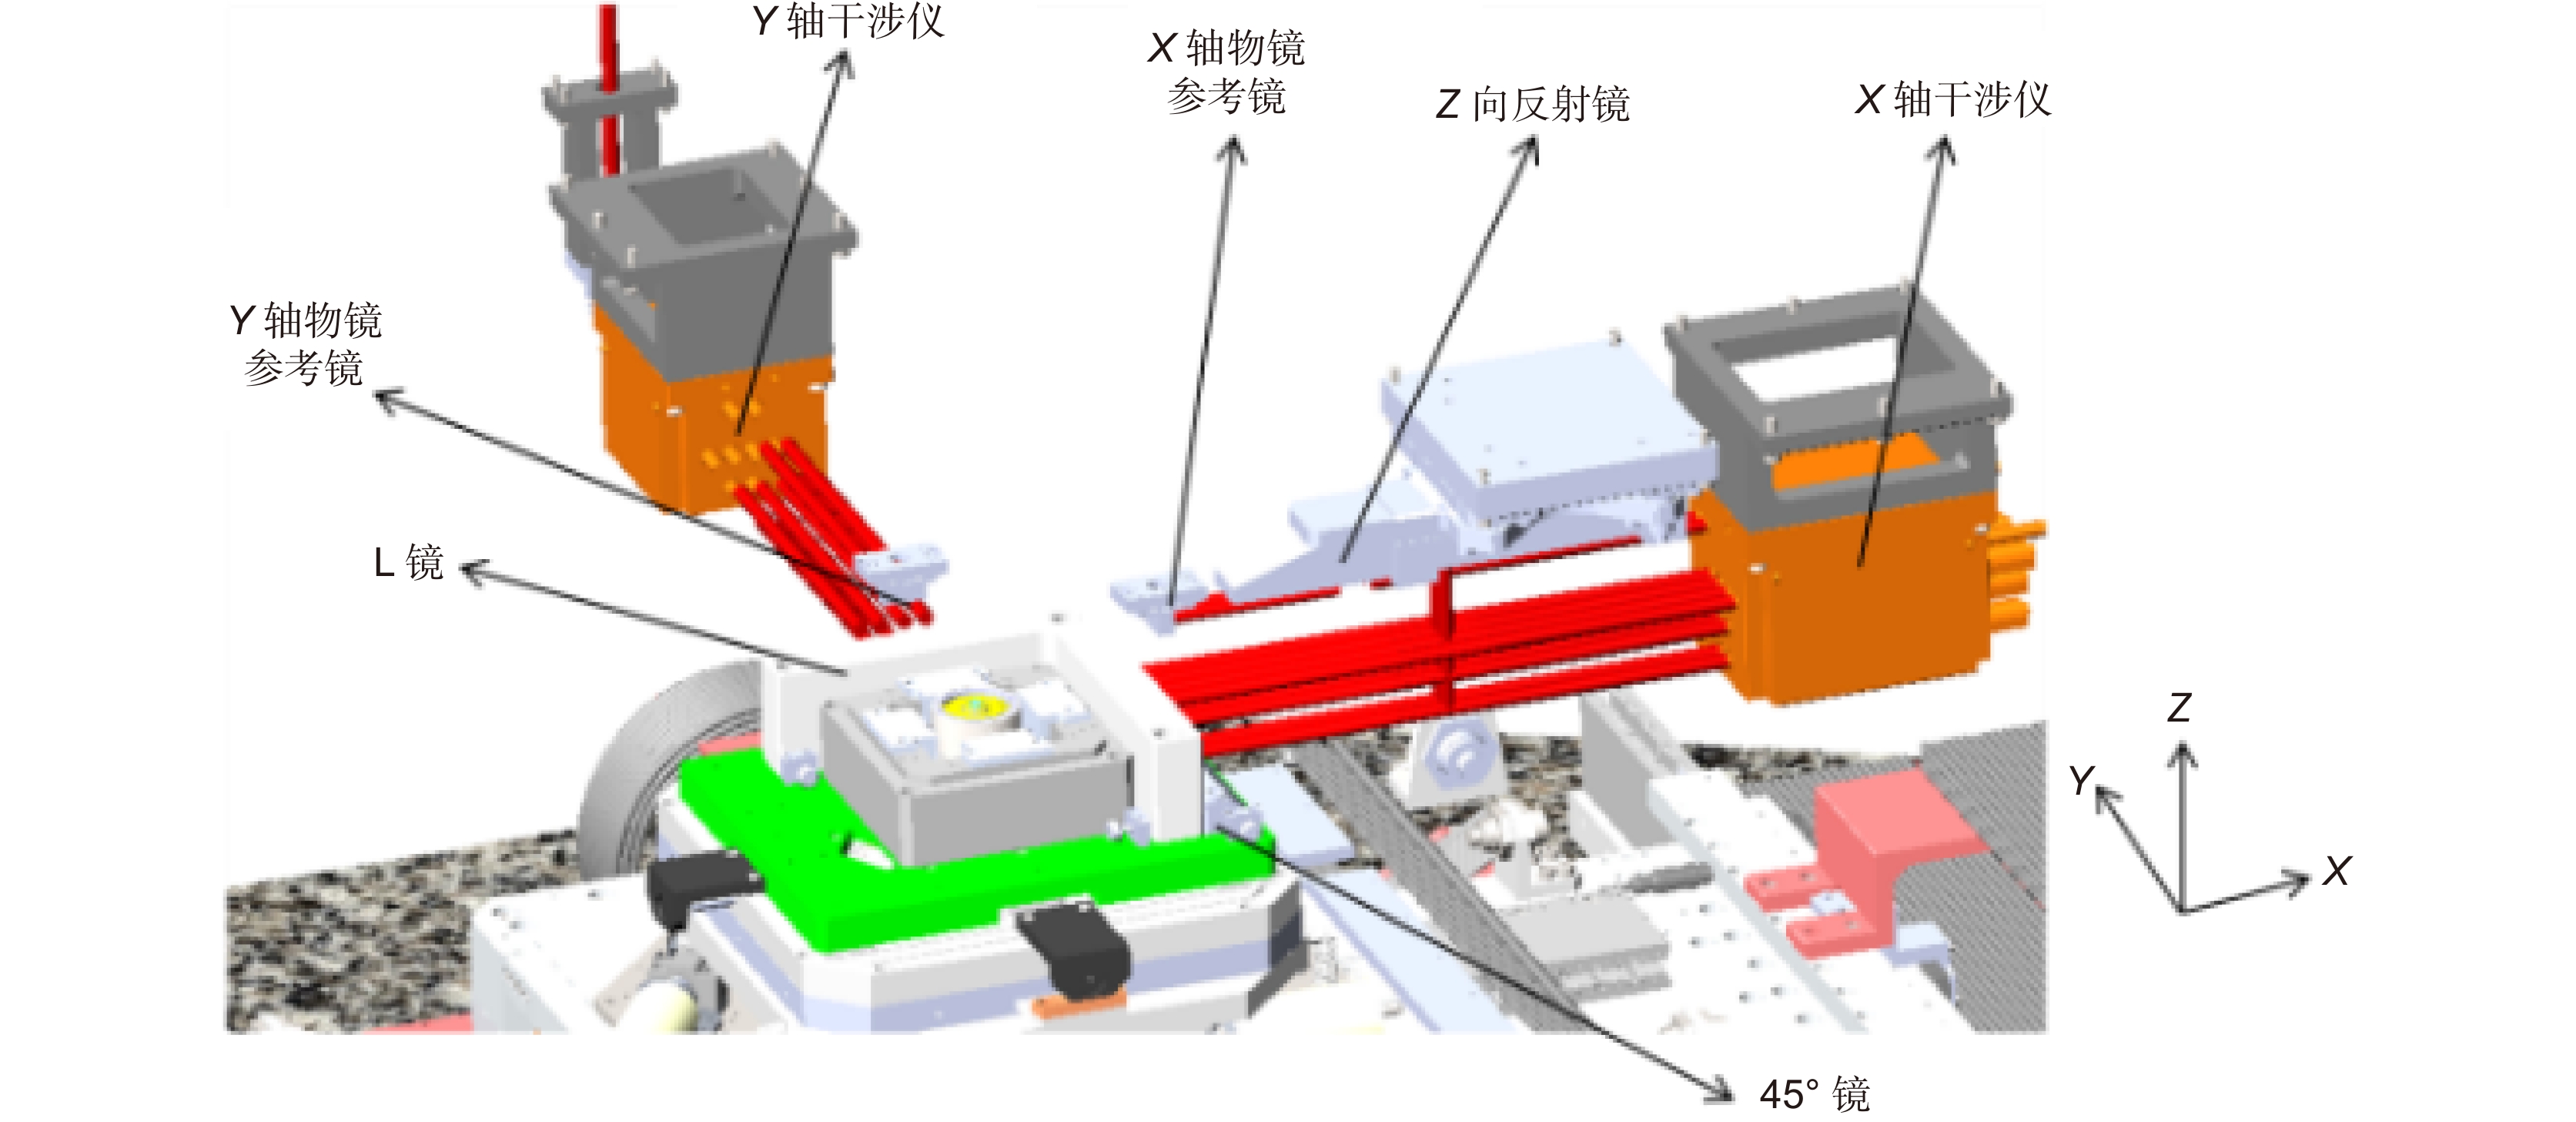
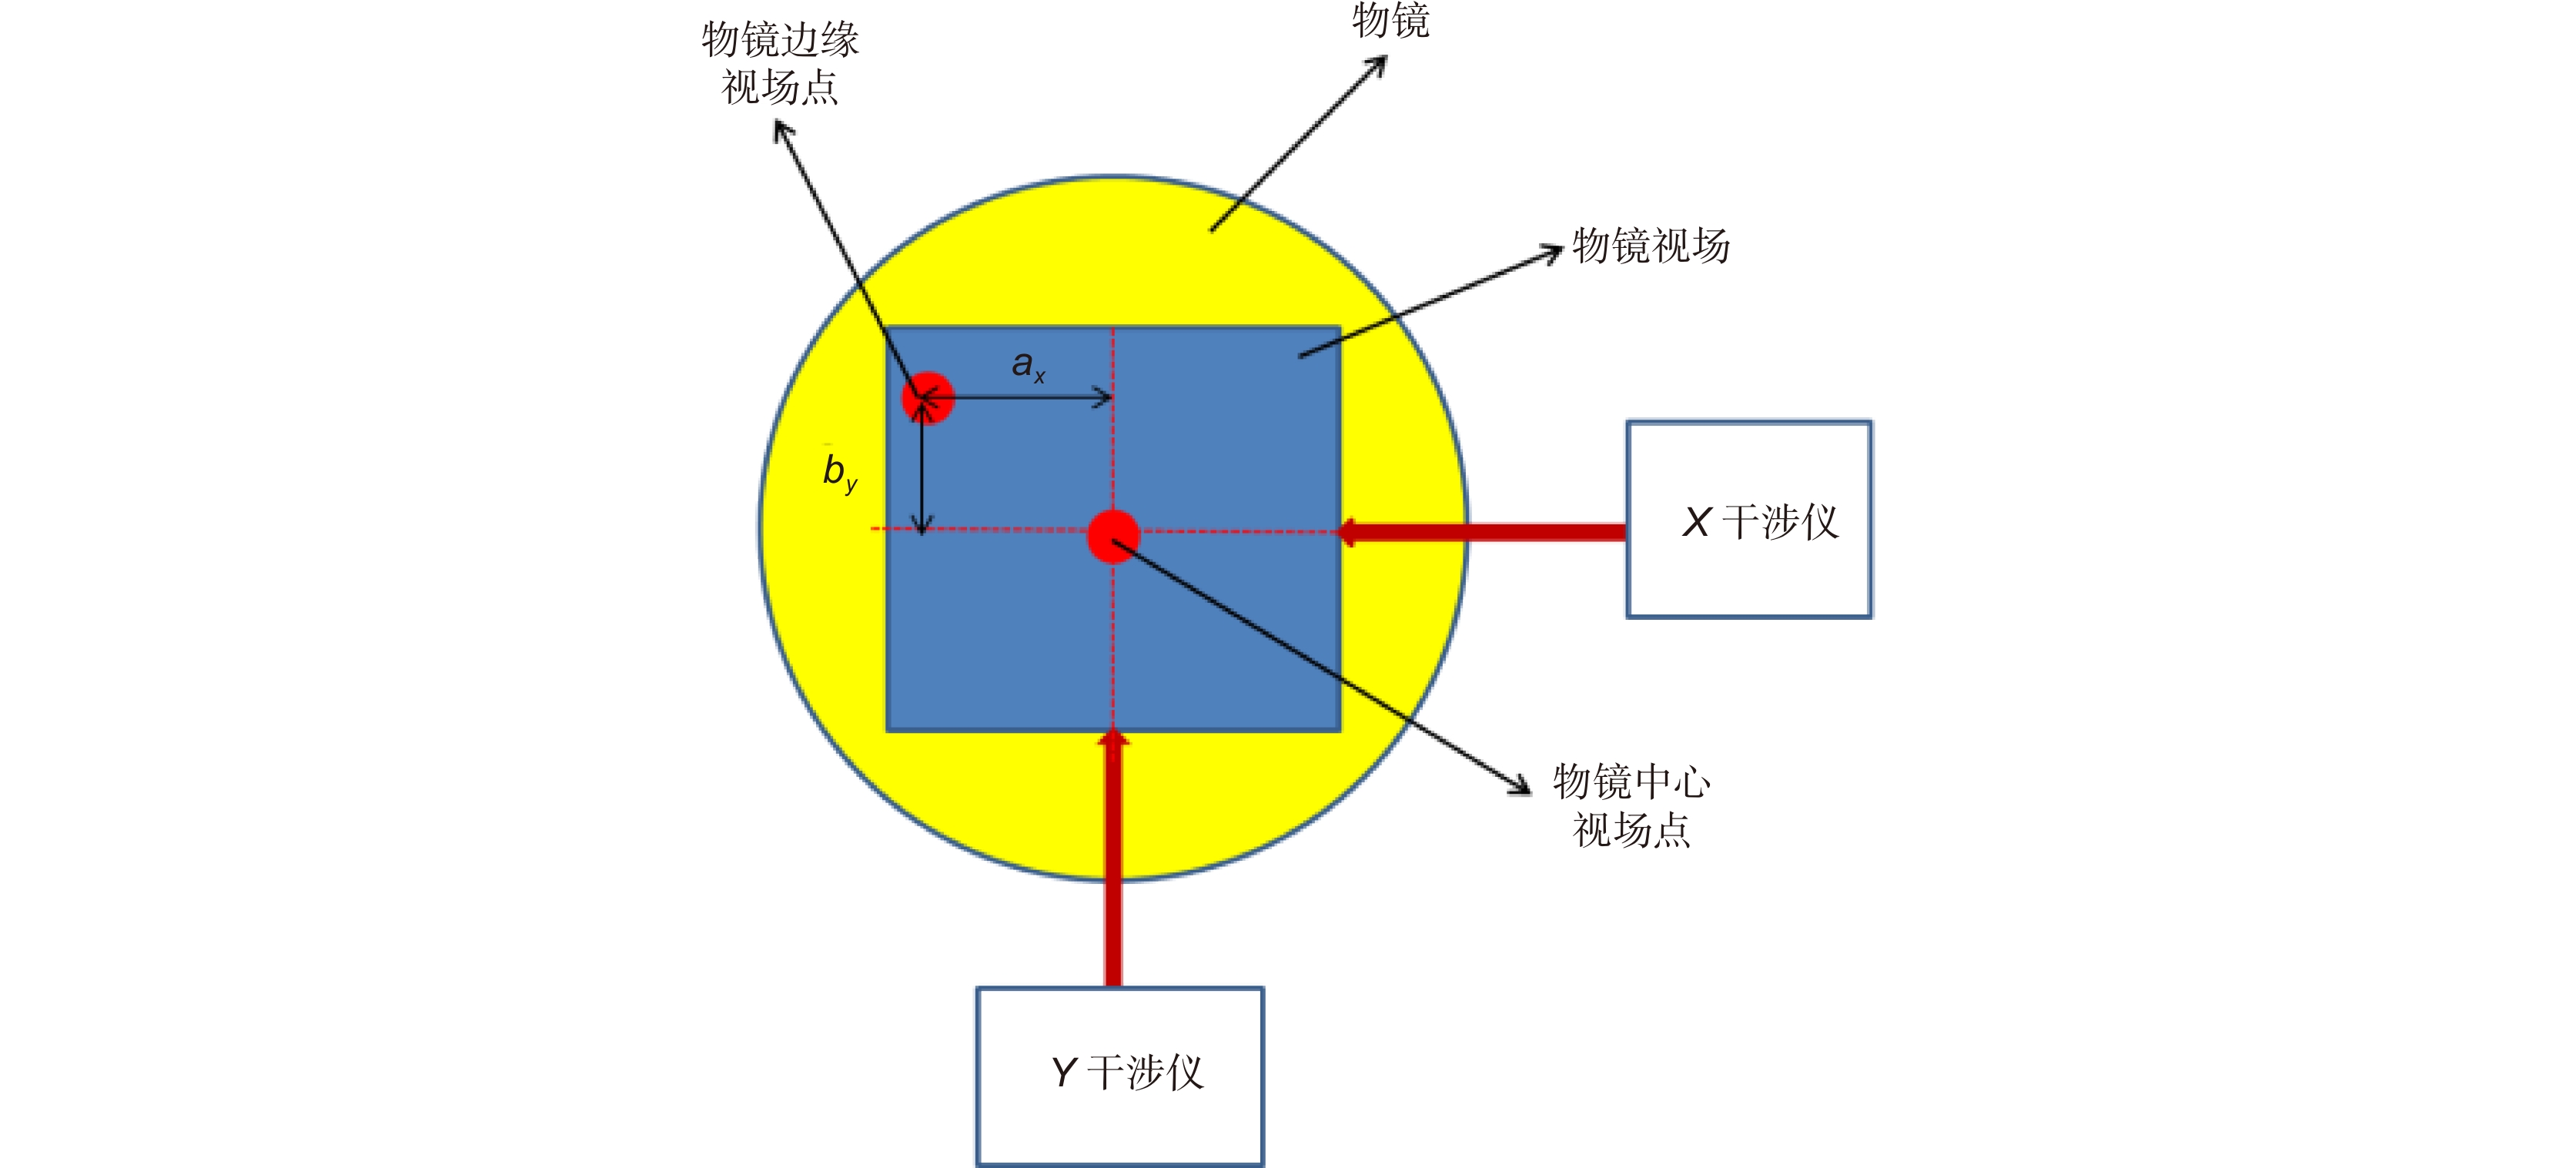
Overview: Lithography accuracy is one of the key parameters to measure the lithography process. Lithography projection objective is the core component of a lithography machine. The distortion of the lithography projection objective is one of the most important factors that affect the overlay accuracy. It causes the position offset exposed on the silicon wafer from the ideal position to the actual position. At present, the detection techniques for the distortion of the projection objective are exposure measurement, aerial image measurement, and wavefront measurement. The exposure measurement that is suitable for lithography manufacturers depends on the exposure process and equipment, thus its detection process is complex. The repeatability of exposure measurement is better than 1 nm. Both the aerial image measurement and the wavefront measurement without exposure are based on the photoelectric sensors. Its detection speed is fast, and the measurement accuracy can be better than 0.4 nm. The image quality detection platform of the projection objective is a device for detecting the optical performance of the projection objective. The wavefront sensor is a device for measuring wavefront aberrations and can also be used for distortion measurement. According to the principle of distortion measurement, when the Hartmann sensor is used to detect the distortion of the projection objective, the measurement accuracy of the mask's actual imaging position through the objective directly affects the accuracy of the distortion detection. So this paper focuses on the analysis of the displacement measurement errors of the image quality detection platform when using the Shack-Hartmann sensor to detect the distortion of the projection objective. The factors that affect the displacement measurement accuracy of the image quality detection stage mainly include the following aspects: the measurement error of the dual-frequency laser interferometer, the horizontal Abbe error of the distortion measurement, and the reproducibility error of the Hartmann position measurement. The measurement errors of the dual-frequency laser interferometer include the instrument error, the geometric error, and the environmental error. These errors are related to the performance of the interferometer, the layout of the interferometer, the performance of the image quality detection stage, and the environmental conditions. The horizontal Abbe error in distortion measurement is due to the fact that the dual-frequency laser interferometer cannot accurately measure the position coordinates of other points outside the central field in distortion detection. The reproducibility error of the Hartmann position measurement means the reproducibility of the Hartman sensor position information measured aiming at a same objective in a period of time. The factors that affect the reproducibility error of the Hartmann position measurement include the fluctuation of the interferometer value, the position control accuracy of the motion stage, the long-term drift of the interferometer, the long-term stability of the Hartmann sensor, the long-term stability of the test light source, the optical properties stability of the objective, etc. In this paper, a set of projection objective image quality detection platform is taken as an example to analyze the errors of its displacement measurement. Its displacement measurement error is about 22 nm within the measurement range of 40 mm × 40 mm. At the same time, the distortion of a projection objective is detected by this image quality detection platform, and the measurement result is about 80 nm. The displacement measurement error in the distortion detection of the lithographic projection objective is one of the important error sources of distortion detection. Depth analysis of the error sources and reduction of the error terms can improve the distortion detection accuracy.
-

-
表 1 双频激光干涉仪仪器误差汇总
Table 1. Instrument errors summary of the dual-frequency laser interferometer
仪器误差 3σ/nm 相关参数 参数值 波长稳定性误差 0.25 被测行程+死程/mm 40+80 电细分误差 0.31 分辨率/nm 0.31 光学非线性误差 1.5 固定值/nm 1.5 数据采集误差 0.01 被测速度/(m/s) 0.01 光束平行度误差 0.04 被测行程/mm 40 合计 1.55 表 2 双频激光干涉仪几何误差汇总
Table 2. Geometrical errors summary of the dual-frequency laser interferometer
几何误差 使用六自由度解算模型3σ/nm 未使用六自由度解算模型3σ/nm 相关参数 参数值 阿贝误差 0.25 1.2 阿贝臂/mm 6 最大俯仰角/μrad 0.2 余弦误差 0.31 5.5 测量行程/mm 40 光轴与运动方向夹角/mrad 0.5 反射镜面形误差 1 30 测量范围/mm 40×40 面形加工误差/nm 30 合计 1.08 30.52 表 3 微环控系统参数
Table 3. System parameters of the micro-environment control system
类别 参数 运行环境温度/(℃) 22±2 运行环境温度变化梯度/(℃/min) ≤0.5 温度设定范围/(℃) 21~−23 全局气浴温度稳定性 ±0.1 ℃@8 h 局部气浴温度稳定性 ±0.01 ℃@4 h 表 4 双频激光干涉仪环境误差汇总
Table 4. Environmental errors summary of the dual-frequency laser interferometer
环境误差 3σ/nm 相关参数/mm 参数值 被测行程长度误差 1.63 被测行程 40 干涉仪热漂移 0.4 - - 材料热膨胀 0.8 干涉仪离反射镜最大距离 128 死程误差 4.5 死程长度 80 机械振动 1 - - 合计 4.97 表 5 像质检测台位置测量复现性
Table 5. Positon measurement reproducibility of the image quality detection platform
点序号 X轴复现性/nm Y轴复现性/nm 点序号 X轴复现性/nm Y轴复现性/nm 1 12.29 2.63 14 2.74 7.06 2 12.69 0.93 15 2.76 8.30 3 14.26 0.17 16 3.73 9.56 4 17.42 0.59 17 7.73 7.09 5 13.70 0.40 18 6.55 10.43 6 8.81 1.82 19 3.36 8.46 7 6.12 3.79 20 2.93 7.35 8 8.86 2.79 21 3.70 10.74 9 9.65 0.87 22 1.40 9.4 10 7.97 0.77 23 0.56 8.01 11 1.57 4.23 24 0.11 6.57 12 2.17 9.51 25 0.74 11.96 13 0.46 6.19 表 6 像质检测台位置测量复现性(关闭微环控系统)
Table 6. Positon measurement reproducibility of the image quality detection platform (micro-environment control system off)
点序号 X轴复现性/nm Y轴复现性/nm 点序号 X轴复现性/nm Y轴复现性/nm 1 90.38 62.10 14 204.77 185.13 2 130.90 50.33 15 228.85 74.61 3 104.52 145.49 16 236.94 103.03 4 128.89 27.5 17 270.60 159.11 5 141.70 92.99 18 243.22 177.69 6 170.90 153.34 19 252.73 171.02 7 154.09 156.13 20 235.13 174.26 8 190.73 152.25 21 218.89 173.47 9 181.26 160.74 22 207.70 170.62 10 189.27 165.97 23 210.58 147.87 11 210.64 187.02 24 219.43 169.11 12 218.64 185.13 25 235.15 186.93 13 186.24 167.52 -
参考文献
[1] Smith A, McArthur B, Hunter Jr R. Method and apparatus for self-referenced projection lens distortion mapping: 6573986[P]. 2003-06-03.
[2] 李术新, 王帆. 光刻机成像质量及工件台定位精度的现场测量方法: 101261451B[P]. 2011-06-29.
Li S X, Wang F. On-site measurement method of image quality of lithography and positioning accuracy of worktable: 101261451B[P]. 2011-06-29.
[3] 杨志勇. 投影物镜倍率误差及畸变的检测装置及方法: 101387833A[P]. 2008-11-07.
Yang Z Y. The detection device and method for the magnification error and distortion of the projection objective: 101387833A[P]. 2009-03-18.
[4] Hagiwara T, Kondo N, Takane E, et al. Aerial image measurement method and unit, optical properties measurement method and unit, adjustment method of projection optical system, exposure method and apparatus, making method of exposure apparatus, and device manufacturing method: 20020041377[P]. 2002-04-11.
[5] van Haren R, Steinert S, Mouraille O, et al. The impact of the reticle and wafer alignment mark placement accuracy on the intra-field mask-to-mask overlay[J]. Proc SPIE, 2019, 11178: 111780R. doi: 10.1117/12.2535900
[6] Lazar B M. ASML alignment sequence generator[D]. Eindhoven: Eindhoven University of Technology, 2012.
[7] 丁功明, 韩春燕, 李术新. 一种物镜畸变和场曲的测试装置及方法、设备: 110941144A[P]. 2020-03-31.
Ding G M, Han C Y, Li S X. Device, method and apparatus for testing distortion and field curvature of objective lens: 110941144A[P]. 2020-03-31.
[8] Mizuno Y. Wavefront aberration measuring instrument, wavefront aberration measuring method, exposure apparatus, and method for manufacturing micro device: 6975387[P]. 2005-12-13.
[9] Ishikawa J. Exposure apparatus, exposure method, and device manufacturing method: 6914665[P]. 2005-07-05.
[10] 舒建伟, 刘国淦. 一种检测投影物镜畸变和场曲的方法: 102540751A[P]. 2012-07-04.
Shu J W, Liu G G. A method for detecting distortion and field curvature of projection objective lens: 102540751A[P]. 2012-07-04.
[11] 李天鹏, 何经雷. 一种基于掩模板的投影物镜性能测试装置以及方法: 105890875B[P]. 2018-12-14.
Li T P, He J L. A reticle-based projection objective lens performance test device and method: 105890875B[P]. 2018-12-14.
[12] 郭庭, 张彬, 顾乃庭, 等. 偏振哈特曼波前探测技术研究[J]. 光电工程, 2021, 48(7): 210076. doi: 10.12086/oee.2021.210076
Guo T, Zhang B, Gu N T, et al. Research on polarization Hartmann wavefront detection technology[J]. Opto-Electron Eng, 2021, 48(7): 210076. doi: 10.12086/oee.2021.210076
[13] 杨旺, 曹玮, 尚红波. 掩模位置误差对光刻投影物镜畸变的影响[J]. 光学 精密工程, 2016, 24(3): 469−476. doi: 10.3788/OPE.20162403.0469
Yang W, Cao W, Shang H B. Effect of alignment errors of reticle on distortion in lithographic projection lens[J]. Opt Precis Eng, 2016, 24(3): 469−476. doi: 10.3788/OPE.20162403.0469
[14] 王建, 刘俊伯, 胡松. 基于自适应非线性粒子群算法的光刻光源优化方法[J]. 光电工程, 2021, 48(9): 210167. doi: 10.12086/oee.2021.210167
Wang J, Liu J B, Hu S. Source optimization based on adaptive nonlinear particle swarm method in lithography[J]. Opto-Electron Eng, 2021, 48(9): 210167. doi: 10.12086/oee.2021.210167
[15] 郁道银, 谈恒英. 工程光学[M]. 2版. 北京: 机械工业出版社, 2006: 120–121.
[16] 曹译莎, 唐锋, 王向朝. 光刻投影物镜畸变检测技术[J]. 激光与光电子学进展, 2022, 59(9): 0922012. doi: 10.3788/LOP202259.0922012
Cao Y S, Tang F, Wang X C. Measurement techniques for distortion of lithography projection objective[J]. Laser Optoelectron Prog, 2022, 59(9): 0922012. doi: 10.3788/LOP202259.0922012
[17] Sudoh Y, Kanda T. New lens barrel structure utilized on the FPA-6000AS4 and its contribution to the lens performance[J]. Proc SPIE, 2003, 5040: 1657−1664. doi: 10.1117/12.485480
[18] 王向朝, 戴凤钊. 光刻机像质检测技术-上册[M]. 北京: 科学出版社, 2021: 95–97.
[19] 程维明, 葛轶君. 精密定位中的激光干涉测量误差分析[J]. 上海工程技术大学学报, 2006, 20(4): 287−290. doi: 10.3969/j.issn.1009-444X.2006.04.001
Cheng W M, Ge Y J. Error analyses for measuring of laser interferometer in precision positioning[J]. J Shanghai Univ Eng Sci, 2006, 20(4): 287−290. doi: 10.3969/j.issn.1009-444X.2006.04.001
[20] 程吉水. 工件台激光干涉仪测量误差模型研究[D]. 武汉: 华中科技大学, 2008.
Cheng J S. Study on interferometer measurement error model in wafer stage[D]. Wuhan: Huazhong University of Science and Technology, 2008.
-
访问统计


 E-mail Alert
 RSS
RSS

 下载:
下载:


